Not to brag, but Facebook and Instagram ads are something we do really well.
If you’re new to advertising on Meta platforms, or you’re thinking of dipping a toe in, you might not know where to start. You have a Facebook page, and some money to spend. Now what?
Because ads strike fear in so many, we wrote a shortish guide on getting Meta Business Manager set up and ready to go as painlessly as possible.
A quick overview
Your Facebook pages, Instagram pages, pixels, ad accounts and websites are all what Meta refers to as ‘assets’. When you start advertising, it’s really important that you use a central place to connect and organise them all.
That central place is called a Business Manager. Think of this as a central hub that manages all of your assets, along with your payment methods, authorisations and users.
1. Ensure you have administrator status on your Facebook page
Before you get started, you’ll need a Facebook profile to confirm your identity, and to be an Administrator of your charity’s Facebook page(s).
Ask an existing Admin to assign your page role if you’re not one already.
2. Set up a Meta Business Manager Account

Meta Business Manager is your hive of activity for all things Meta. It’s a secure way of organising, managing and logging into your charity’s assets – like Facebook, Instagram and ad accounts.
Doing it this way will mean your accounts are accessible by multiple personnel with assigned roles and permissions. It’s a much easier way of centrally managing multiple assets, such as if:
- You have multiple Facebook Pages for each of your retail stores
- You work with multiple agencies, and you need one ad account for each to keep their work separate
- You work with a few contractors and want to give them different levels of access to different accounts
- You have multiple domains, such as a main website and a microsite, that you might want to track using different pixels
Importantly, many ads reporting tools only work through Business Manager – so setting one up is a critical step.
When setting up your Business Manager account, use a general email like [email protected]. It’ll save headaches later when staff, roles, or responsibilities change and your account is forever linked to someone you have no idea how to get in touch with.
3. Verify your charity
When you create your Meta Business Manager account, for advertiser safety reasons, you have to verify your charity to ensure you’re a legitimate organisation. This will also come in handy later when you’re clearing new advertiser hurdles, like spend caps or policy reviews.
You’ll need your registered address, charity number, official phone number and email address to receive a verification code to do this.
In some circumstances, Meta requests personal verification, too, which usually involves uploading a copy of your ID.
4. Create or claim a Meta Ads Account
This step relates to assigning ownership of the ad account. Each Business Manager can have ownership of ad accounts, in which you’ll actually build and deliver your campaigns.
Generally, charities don’t need multiple ad accounts and we recommend that you just keep one, especially if you’re a new advertiser and your planned marketing activity and budgets are quite small.
Keep in mind: pixels are only track behaviour and conversions for the ad account it’s linked to. So the best way to do this is to keep it simple: one pixel and one ad account for now.
However, you might consider having different ones if you’re a larger charity with more complex plans for paid social, for example…
- You use different payment methods for different departments and want to keep their budgets and invoicing separate
- You have multiple agencies or contractors working on your accounts and don’t want them to have view of each others activity
- You work in different countries or regions that are tracked and measured using different pixels
There are three ways to add ad accounts to your Business Manager:
- Create a new ad account – If you don’t have an ad account, simply create one in Business Manager.
You can’t transfer ownership of an ad account to another Business Manager. The association between accounts is permanent, so make sure you’re setting it up in a Business Manager you own, plan to continue using long into the future and are sure you’ll continue to have access to.
If you’re working with a third party or an agency, make sure the ad account is owned by your Business Manager, not theirs. - Connect an ad account that already exists to your Business Manager – Sometimes ad accounts can be created without ever being added to a Business Manager – such as if you started advertising without following this set up guide first!
In this case, you’ll need to add the existing ad account to your Business Manager. You need to own the ad account and be an admin of the Business Manager. All future management of that particular ad account must be completed via your Business Manager profile, not via separate log-in. - Request access to an ad account connected to someone else’s Business Manager.
Sometimes you might need access to an ad account that’s owned by a different Business Manager, such as:- if an agency set up an ad account on your behalf in their Business Manager.
- If you’re working with another charity or business and are setting up ads via their ad account
In cases like this where you intend to use an ad account owned by another business, you can request access from the current owner. This gives you access and some rights to the account, but you can’t transfer ownership and your access could be removed at any point by the busines who does own it.
Remember – it’s always better to own your own ad account, inside your own Business Manager.
5. Connect your Facebook page to Business Manager
Well done – you’ve done the ads part! Now you need to use your Business Manager to claim your Facebook page.
Remember step 1? By adding your charity’s Facebook page to Business Manager, you’re claiming ownership of it – that’s why you have to be a page admin before you begin.
If you’re not the page owner and someone else within your organisation is, all isn’t lost. Simply use the ‘claim a page’ option. Meta breaks down exactly how to claim your page here.
Things can get a bit sticky here if you’re not an admin. If page owner used a personal email address to set up the page, you might need to track them down and get them to transfer ownership to you. If they used their work email address, you might need to access their inbox to get the verification emails.
(It’s situations like this that make having a Business Manager a crucial part of your advertising set up).

6. Connect your Instagram page to Business Manager
Because Meta owns both Facebook and Instagram, you can also connect your Instagram account to Business Manager.
If it’s not already, convert it to a Business profile and add it to your Business Manager account by following these instructions.
7. Assign access and permissions to your team
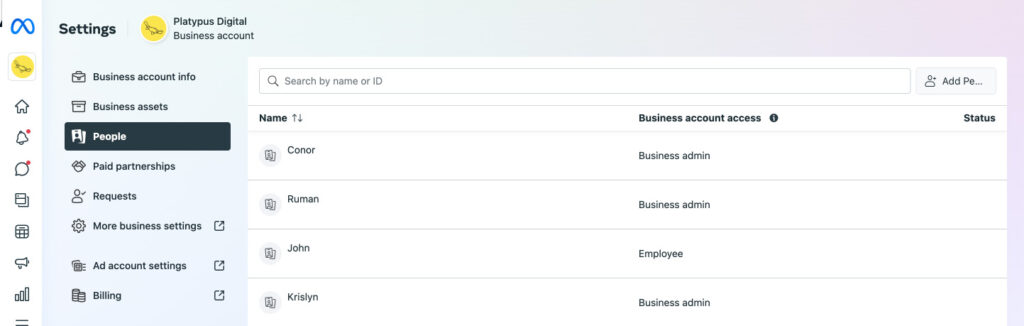
Your marketing assets are now connected to your Business Manager! Now it’s time to grant your team members access.
We strongly recommend you invite people using their work email addresses. They don’t need to create a new Facebook account.
To add a person to Business Manager, you must be an Administrator.
When assigning individual permissions, you can grant two types of permission functions:
- asset permission is what they’re granted access to – Facebook, Ads Manager, Instagram. This is great for people who might work on some areas of the business but not others.
- task permission is the level of access to any given asset. For example, you can give someone access to create versus viewing financial transactions and approving ad spending.
You can assign also assign people different areas of access:
- Administrative – for full management of all the connected assets and information
- Employee – for partial access to selected assets, but access is generally restricted
- Finance access – for finance teams to access invoices and payment methods
We recommend only granting admin access to one or two people because they can edit settings, people, accounts, and tools, whereas ‘employees’ can only work on assigned tasks and tools.
We also recommend that everyone with access turns on two factor authentication, to prevent the account being hacked.
Once added, your team member will receive an invitation to join via the email address you used.
To begin assigning roles, head to your Business Settings and follow these instructions.
8. Add your agencies or freelancers, if you’re using them
Now you can add third parties you’re working with.
Best practice tip: Don’t add agencies or freelancers to your Business Manager as individuals. They should have their own Business Managers, and these should always be added to your account as partners.
You’ll need their partner business ID. Once you’re connected as partners, and you can give them access to the assets you want them to work on.
An admin of their Business Manager then needs to assign asset permission to members of their own team in order for them to start working on your accounts.
More info on adding partners here.
9. Set up your payment method
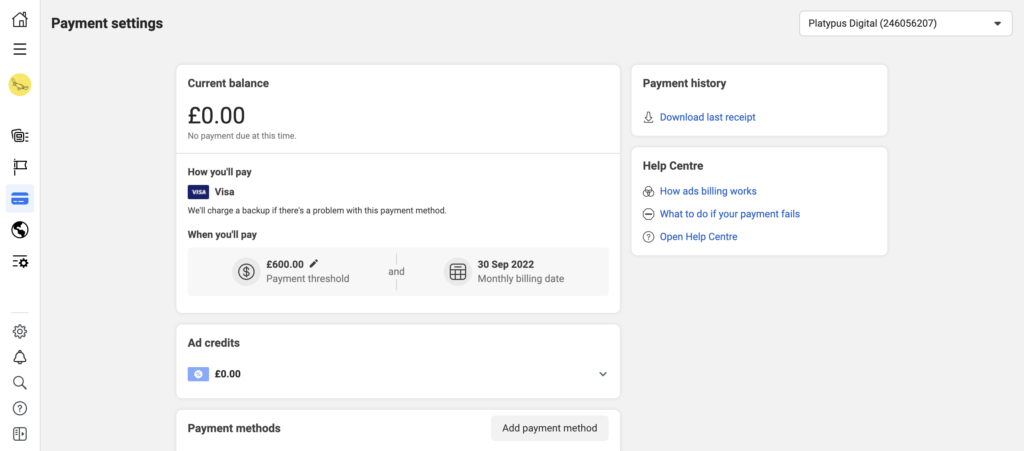
You’ll need to add a payment method to your account, or you can’t run any ads!
Only Business Manager Administrators and Finance editors have permission to do this. It takes around 2 days.
Meta’s step-by-step payment set-up instructions are pretty straightforward, provided you have the correct permission level.
10. Verify your domain
This is a slightly tricky step. You can definitely do it on your own, but if you have IT or website development support, we recommend having them on hand for this one.
Domain verification in Business Manager means confirming that you own the domain that is connected to your account. This helps Meta make sure advertisers aren’t driving traffic to websites that don’t belong to them – an anti-advertising fraud measure.
Doing this also helps Meta to establish which conversions to prioritise when it’s optimising and measuring your campaigns.
As well as Administrator status within Business Manager, you’ll need Administrator or Developer access to your domain asset (you should be familiar with the process of assigning assets now!)
There are three ways to verify your domain:
- Add a meta-tag to your HTML source code in the <head>….</head> section of the HTML, and publish the page.
- Download the HTML verification file that’s linked on your Business Manager screen, and upload the HTML file to the root directory of your domain.
- Update the DNS TXT record within your domain registrar.
You’ll find detailed domain verification instructions here.
This could totally go over your head if you’ve never seen the back end of a website or aren’t familiar with code, but all is not lost! Contact your developer or call us – we’re here to help.
11. Set up conversion tracking (Meta pixel)
That last step was tricky, and this one is too (sorry). If you do it incorrectly, it can lead to real problems later… and they can be really hard to spot until it’s too late.
So, if you can, please enlist some developer help (or contact us – we know our conversion tracking back to front).
The Meta Pixel is a super vital measurement tool. It’s a snippet of JavaScript used to track Meta Ad-driven activity on your website. It builds a picture of your visitors, tracks the URLs and domains they visit, reports on the actions they’re taking, and measures your ad campaign performance.
As we mentioned earlier, your pixel is specific to your ad account, so if you have multiple active ad accounts, you may need to install multiple pixels on your site to make sure you’re measuring relevant traffic.
To implement the pixel, you’ll need access to your website code, Ads Manager, and your pixel base code (viewable in Ads Manager > Events Manager).
You need to install your Meta pixel base code in the header of your website to make sure you’re tracking traffic. Placing the code within each page’s <head> tags reduces the chances of third-party code blocking the pixel’s execution.
For additional advice, check out this Meta for Developers article.
Or, you guessed it, get in touch. We eat Business Manager queries for breakfast.
12. Set up conversion tracking (standard and custom events)
Once you’ve installed your pixel base code in your website header. This means you can track page views – yay! But nothing else just yet.
The next thing you’ll want to do is install another one on every page on which you’ll want to track a behaviour or transaction.
Again, you’ll need a developer’s help to do this. First, you need to define what events you want to track. Meta has 9 standard events, so you’ll want to categorise each of your behaviours against one of these.
You will also want to consider if there are subcategories of these that you might want to track. For example, you could have a standard event called ‘registrations’ that tracks all your challenge registrations, but you might also want to differentiate between registrations for London Marathon, or for Ride London. These would require your developer to define custom conversions in your ads account.
Then, you’ll need to define your Custom events – events you want to track that don’t fit into Meta’s standard events. Most charities we work with don’t need these, though.
Meta has detailed instructions on both standard and custom events. Read them here.
Now you can build your first ad campaign!
Without the proper support, setting up Meta Business Manager can leave you feeling confused and lost. It’s a proper maze – but if you follow the instructions above you shouldn’t go far wrong.